Configure emails for outbound communication including standard registration, moderation, lost password emails, or create your own template.
Configuring Outbound Email
As part of your overall setup across projects and applications, you must indicate whether you want emails to be sent to your website’s user base. You have the following options when configuring outbound email:
- Off - Emails are not sent.
- Send by default - Moderation emails are sent for all users that have not opted out.
- User must opt-in - Moderation emails are only sent to those that have explicitly opted in. To work, this option must appear in the user profile page.
To configure outbound email:
- In Media Factory, from the drop-down list in the left-hand corner under the Media Factory logo, select the project you would like to modify.
- In the Navigation bar, select Settings>Manage Projects.
- On the Manage Project page, from the Media Moderation Email drop-down list, select an option.
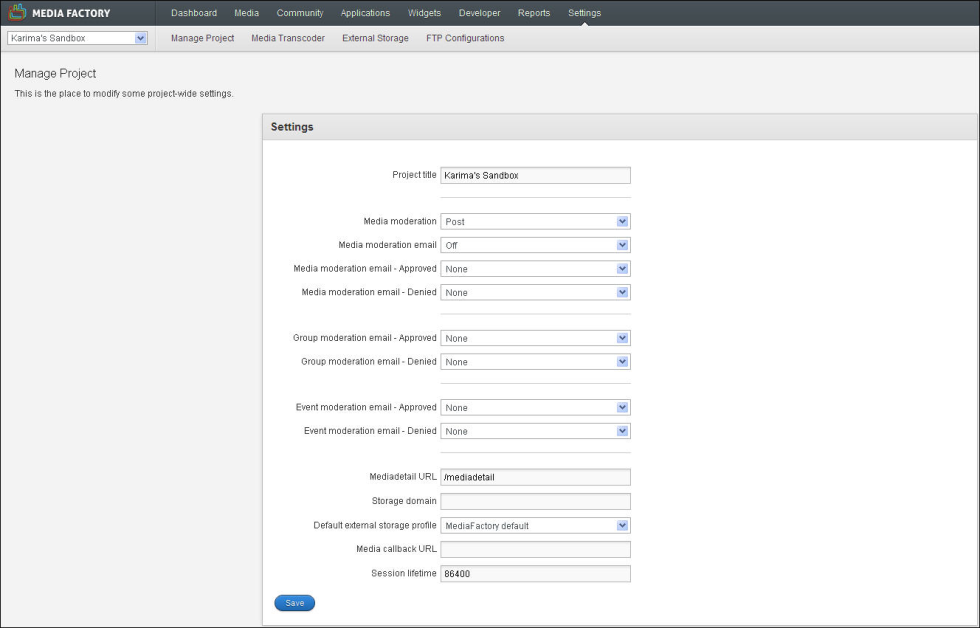
- Click Save.
Activating Registration and Lost Password Emails
As part of your application setup, you can activate the registration and lost password email features. Before you activate these features you should have email templates set up so that they are ready to be sent when users register or ask to reset their passwords. For information on setting up email templates, see “Create New Email Templates.”
To activate registration/Lost Password Emails:
- In Media Factory, from the drop-down list in the left-hand corner under the Media Factory logo, select the project you would like to modify.
- In the Navigation bar, select Applications> Applications.
- On the Applications page, select an application.
- In the Sections area, click the Settings link.
- On the Applications Settings page, click the User Actions tab.
- Enable the register and the lostpassword check boxes, and click on them to expand. You'll need to make sure the email confirmation is enabled for each function.
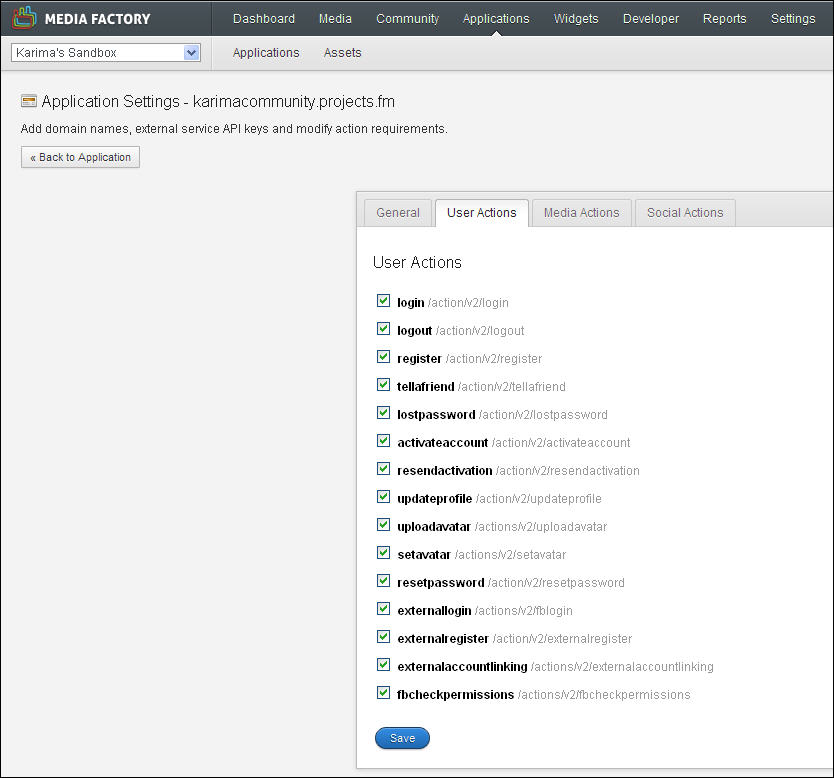
- Click Save.
Selecting Email Templates for Approved/Denied Media
You can indicate which email templates to use for approved/denied media emails. Once you select an email template, emails will be sent each time a moderator approves or denies uploaded media. Emails are only sent to those users who have chosen to receive them.
To select the email templates to use when media is approved/denied:
- In Media Factory, from the drop-down list in the left-hand corner under the Media Factory logo, select the project you would like to modify.
- In the Navigation bar, select Media>Channels.
- On the Channels page, select a channel. For example, click the Comments channel.
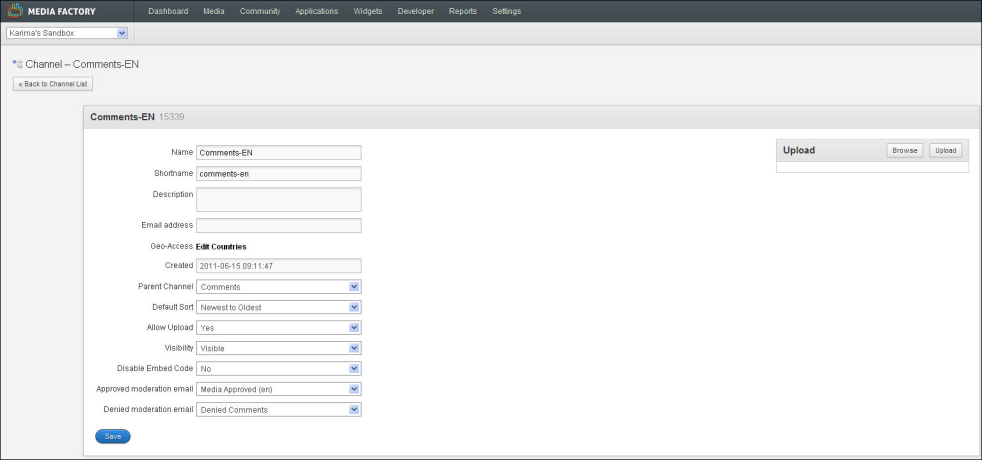
- From the Approved Moderation Email drop-down list, select an email template to use in the automatic email response sent when media approved.
- From the Denied Moderation Email drop-down list, select an email template to use in the automatic email response sent when media is denied.
Note: If you cannot find an email template that you want to use, you can create a new one. For more information, see “Creating New Email Templates.” If you select Default, no email is sent.
- Click Save.
Creating New Email Templates
You can create new email templates so that emails are automatically sent in the following scenarios:
- When your users forget their passwords. In this email template, you can use the following variables
- {$username} : provides the username
- {$resetpasswordurl}: provides a randomized reset password URL
- When your users’ uploaded content is approved. In this template, you can use the following variables
- http://yourdomain.projects.fr/entry/{$media_id}: provides a link to the media item. For example, http://contest.projects.fm/entry/4890057.
- When your users’ uploaded content is denied. In this template, you can use the following variables
- {$deniedReason}: provides the reason for denying the media. When moderators deny content from the Media Detail page, they can choose a pre-defined reason from a list. The reason they select appears when you use this variable.
- When your users share your site using the Tell a Friend feature. In this template, you can use the following variables
- {$message}: provides the message content specified by the person who is sharing the website page
{$$media_title}: provides the title of the shared media
{$$media_publicUrl}: provides the URL of the media.
For example, http://rstorage.filemobile.com/storage/4890057/15
- When your users activate one of your applications. Activation emails are sent before a user is registered and includes a link to activate the account. The link is in the following format {$$vhostname}/action/v2/activateaccount?s={$$s}&u={$$u}, where vhostname is the name of the project associated with the application the user is activating. For example, http://contest.projects.fm/action/v2/activateaccount?s=76fasdfa87sdfasd8f76asdfasd&u=a9sd8f7a09sd8f7asd09f8a7sd09f
Note: When email activation is not required, which is the majority of the time, the user is registered, made active immediately and sent a confirmation email.
To create a new email template:
- In Media Factory, from the drop-down list in the left-hand corner under the Media Factory logo, select the project you would like to modify.
- In the Navigation bar, select Applications> Applications.
- On the Application page, select the application for which you want to set up an email template.
- In the Sections area, click the Email Templates link.

- On the Email Templates page, click New.
- In the Template Name text box, specify a unique name for the template. For example, Comment Denied.
- From the Wrapper Template drop-down list, select an option.
Html is the default usually.
- In the Subject text box, type the subject of the email.
- In the Sender text box, provide a no-reply email address.
You can customize the domain.

- Click Create.
- In the text box that is displayed, you can create a brand new email message from scratch or you can copy an existing email template and customize it.
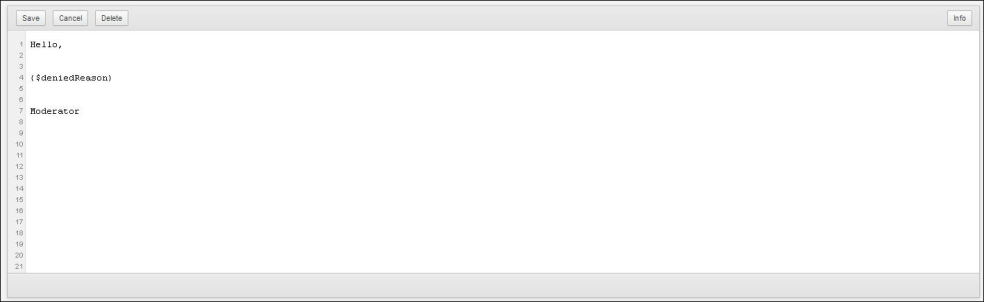
- Click Save.

