Channels
Channels are used to organize media according to your preferred internal structure. Channels act as content folders, and just like real folders, media can only exist in one channel at a time. Common ways to use channels are to organize your content around its origin: Internal Submissions channel and Public Submissions channel, or language: English channel and French channel. You can also use them to separate your content by type such as Media, Comments, Avatars, Logos, etc.
When you create channels you can nest them so that one channel becomes the parent of another.
Creating Channels

-
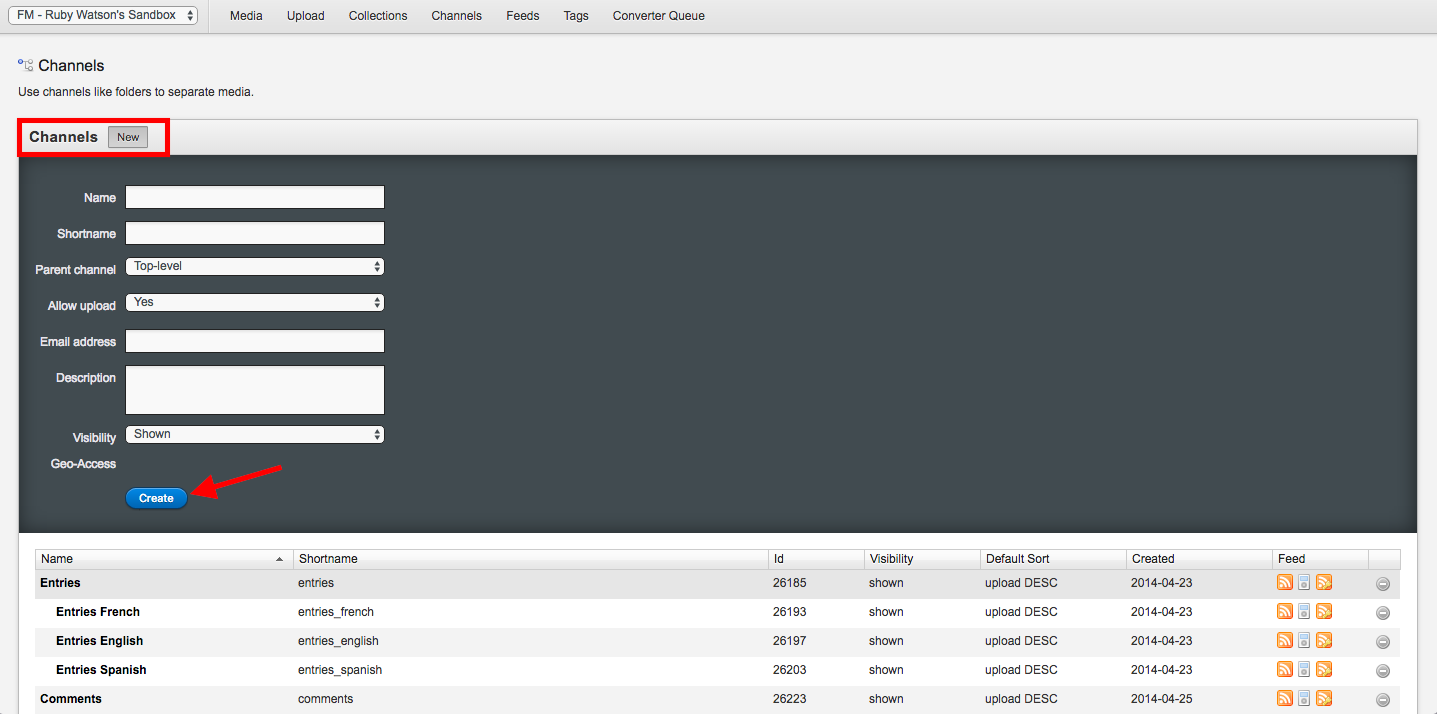
From the top Navigation bar, select Media > Channels
-
On the Channels page, click New
-
In the Name field, type a channel name
-
In the Shortname field, type a unique identifier for the channel that you will be able to use if customizing templates
-
If you want to nest this new channel under an existing channel, from the Parent drop-down list, select the channel under which you want this channel to appear
-
From the Allow upload drop-down list, select Yes or No. If you select Yes, your website users will be able to upload media directly to this new channel. If you select No, the channel will not be available on the front-end for upload
-
In the email address field, specify the address you want to assign to the channel. This is used for media submissions made via email. If you don’t have your own email domain to setup as an alias, you can use somename@projects.fm. This email must be unique, but you can leave it empty if you don’t want to use this feature
-
In the Description field, specify the purpose of the channel
-
From the Visibility drop-down list, select Shown or Hidden. You would hide channels so that they do not appear on your website where users can upload content to them. For example, you may choose to hide the Avatars or Comments channels
-
To restrict the visibility of the media stored in this channel to certain countries, click on Geo-Access and then select the check boxes next to the countries in which you want the media to be available

Note: If you leave all check boxes blank, the media will be available worldwide
-
Click Create
Viewing and Editing Channel Properties
Once a channel has been created you can view and edit its properties. You can also upload content directly to it and then moderate that content. You can perform all of these tasks from the same screen.
To view and edit channel properties:
-
In the Navigation bar, select Media > Channels
-
On the Channels page, click the name of a channel
-
On the page that is displayed, you can see the properties that were set when the channel was created. You can also set additional properties for the channel
-
To set the sort order in which you want the channel’s media to be displayed, from the Default Sort drop-down list, select an option

For information about the Approved/Denied Moderation Email drop-down lists, refer to the “Selecting Email Templates for Approved/Denied Media” topic
-
To upload new media to this channel, click the Browse button, select your media, and then click the Upload button
Note: You can moderate the content in Media section at the bottom of the screen. For more information on moderation, refer to the “Moderation” article

-
If you changed the channel properties, click "Save"
Moving Media between Channels
Using the Media Overview page, you can easily move content between channels.
To move media between channels:
-
In the Navigation bar, select Media
-
On the Media Overview page, select all the items you want to move
-
In the Actions section, from the Move to channel drop-down list, select a channel
Note: To select multiple media items, change the display to List view by clicking  . In this view, you can select check boxes beside each item you want to move into a different channel


